Bleeding Hydraulic Bike Brakes – A Complete Guide
Share
Hydraulic disc brakes are an indispensable solution for cyclists who demand precise and powerful braking. However, to keep them working efficiently, regular bleeding is essential. In this post, we will guide you step-by-step on how to properly bleed hydraulic brakes, the tools you will need, and what to pay attention to during the process.
Why is Bleeding Brakes So Important?
Over time, air bubbles can form in the hydraulic system, reducing braking efficiency. Air is compressible, causing the brake lever to feel “soft” and requiring more pressure to achieve the desired braking force. Regular bleeding ensures optimal system performance and safety during rides.
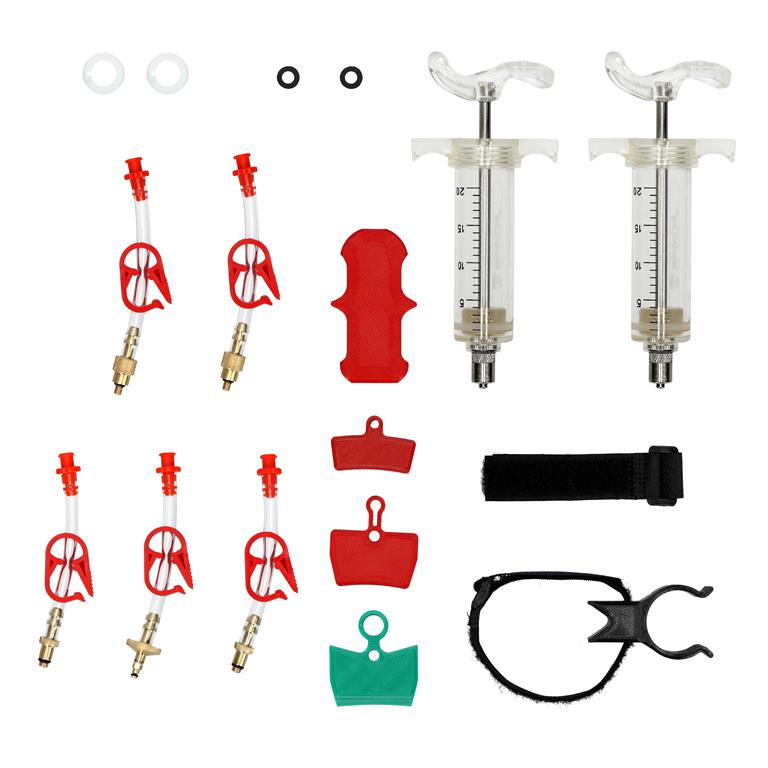
What Will You Need?
Prepare the following tools and materials:
-
Brake bleeding kit – consisting of:
-
syringe,
-
hose,
-
bleed funnel.
-
-
Brake fluid – compatible with your system requirements (DOT or mineral oil).
-
Allen keys and Torx wrenches – to unscrew components in the brake system.
-
Protective gloves – to avoid contact with brake fluid.
-
Clean rags and degreaser – to maintain cleanliness.
Step-by-Step: How to Bleed Hydraulic Brakes
1. Prepare Your Workspace
Secure the bike, preferably on a repair stand. Ensure you have access to the brake calipers and levers. Clean the work area to prevent contaminants from entering the system.
2. Check the Type of Fluid
Before starting, confirm which type of brake fluid your system uses (DOT or mineral oil). Using the wrong fluid can damage the seals.
3. Attach the Bleed Funnel
Unscrew the bleed port screw on the brake lever and attach the bleed funnel. Fill it with the appropriate amount of brake fluid.
4. Prepare the Syringe
Fill the syringe with brake fluid, ensuring no air is trapped. Connect the hose to the brake caliper and ensure everything is sealed tightly.
5. Bleeding Process
-
Slowly push the syringe plunger, forcing the fluid through the system toward the bleed funnel.
-
Watch for air bubbles in the fluid. Continue until no more bubbles appear.
-
Close the bleed screw on the caliper and remove any excess fluid from the funnel.
6. Final Check
After completing the bleeding process, ensure the brake lever operates correctly – it should feel firm and responsive.
7. Cleaning Up
Remove any residual brake fluid from the brake lever and caliper areas, as it can damage paint or components.
What to Avoid During Bleeding?
-
Using the wrong fluid – this can lead to system damage.
-
Improperly tightening screws – can cause leaks.
-
Skipping regular maintenance – even the best brakes require periodic servicing.
When to Visit a Professional Service?
If you don't feel confident bleeding the brakes yourself or notice fluid leaks, it's best to consult a professional bike service. Experts have the specialized tools and knowledge to resolve even the most complex issues.
Conclusion
Bleeding hydraulic bike brakes is a crucial part of maintenance that can significantly impact your safety and riding comfort. With this guide, you can perform the process yourself and avoid common mistakes. Remember to regularly check your brake system to ensure your bike is always ready for new challenges.
Have Questions?
Leave a comment below or visit our online store, where you'll find bleeding kits and professional brake fluids tailored to your bike!